How to Make Skin Care Products at Home Easy: DIY Guide
Making your own skin care products at home is easier than you think. It’s fun, cost-effective, and you know exactly what goes into them.
Imagine having control over your beauty routine while using natural ingredients. Homemade skin care products can cater to your unique skin needs without breaking the bank. Plus, you’ll avoid harmful chemicals often found in store-bought products. In this guide, we will show you simple recipes and techniques to make effective skin care solutions.
From soothing face masks to nourishing body scrubs, you can create it all with everyday items from your kitchen. Whether you have dry, oily, or sensitive skin, you will find a recipe that fits. Let’s dive in and start making your skin glow naturally!

Benefits Of Diy Skin Care
Making skin care products at home can be both fun and beneficial. DIY skin care allows you to know exactly what ingredients you’re using. Plus, it often costs less than store-bought products. This post will explore the many benefits of DIY skin care.
Cost-effective Solutions
One of the biggest benefits of making skin care products at home is the cost savings. Here are some reasons why DIY skin care is easier on your wallet:
- Lower Ingredient Costs: Many skin care products use natural ingredients like honey, olive oil, and oatmeal. These are often cheaper than buying pre-made products.
- Bulk Buying: You can buy ingredients in bulk and use them for multiple recipes. This reduces the cost per use.
- Reuse Containers: By reusing containers from old products, you save money and reduce waste.
Below is a table showing the cost comparison between DIY and store-bought skin care products:
| Product | DIY Cost | Store-Bought Cost |
|---|---|---|
| Face Mask | $2.00 | $10.00 |
| Body Scrub | $3.00 | $15.00 |
| Moisturizer | $4.00 | $20.00 |
Clearly, DIY skin care can save you a lot of money. Plus, the ingredients you buy can be used for other recipes too.
Customization Options
Another great benefit of making your own skin care products is the ability to customize them. This is especially useful for people with specific skin care needs. Here are some ways you can customize your DIY skin care:
- Choose Your Ingredients: Pick ingredients that suit your skin type. For example, use aloe vera for sensitive skin or tea tree oil for acne-prone skin.
- Adjust the Formula: You can change the amount of each ingredient to get the perfect consistency and effectiveness.
- Add Essential Oils: Essential oils not only smell good but also offer additional benefits like relaxation or anti-inflammatory properties.
Below is a list of common skin types and suitable ingredients for each:
| Skin Type | Recommended Ingredients |
|---|---|
| Oily | Tea tree oil, lemon juice, clay |
| Dry | Coconut oil, shea butter, honey |
| Sensitive | Aloe vera, chamomile, oatmeal |
| Combination | Jojoba oil, rose water, green tea |
With these customization options, you can create the perfect skin care product for your unique needs. The best part? You control what goes into it, ensuring it’s free from harsh chemicals.

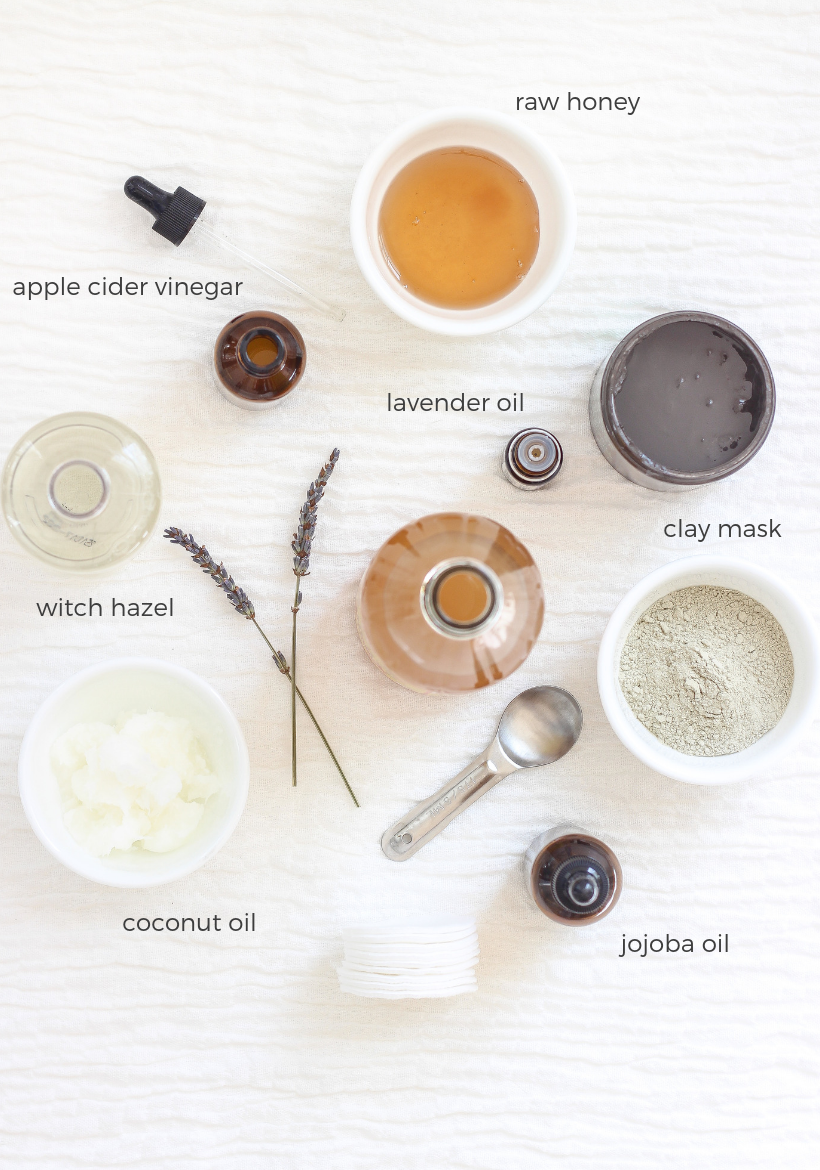
Essential Ingredients
Creating your own skin care products at home is a simple and rewarding process. Knowing the essential ingredients will help you craft effective and natural solutions. These ingredients are easy to find and offer numerous benefits for your skin.
Natural Oils
Natural oils form the base of many homemade skin care products. They are rich in vitamins and antioxidants, which nourish and protect your skin. Here are some popular natural oils:
- Coconut Oil: Moisturizing and antibacterial. Great for dry skin.
- Olive Oil: Rich in antioxidants. Helps to protect and hydrate the skin.
- Jojoba Oil: Similar to skin’s natural sebum. Balances oil production.
- Almond Oil: Packed with vitamins A and E. Soothes and softens the skin.
- Argan Oil: High in vitamin E and fatty acids. Nourishes and heals the skin.
Each oil has unique properties. You can mix them to suit your skin type:
| Skin Type | Recommended Oils |
|---|---|
| Dry Skin | Coconut Oil, Olive Oil |
| Oily Skin | Jojoba Oil, Argan Oil |
| Sensitive Skin | Almond Oil, Jojoba Oil |
Experiment with different oils to see which ones work best for your skin.
Herbs And Extracts
Herbs and extracts add beneficial properties to your skin care products. They are natural, gentle, and effective. Here are some popular herbs and extracts:
- Aloe Vera: Soothes and heals. Great for sunburns and irritated skin.
- Lavender: Calms and reduces inflammation. Suitable for all skin types.
- Chamomile: Anti-inflammatory and soothing. Ideal for sensitive skin.
- Green Tea: Rich in antioxidants. Protects and rejuvenates the skin.
- Rosehip Extract: High in vitamins A and C. Promotes skin regeneration.
These herbs can be used in various forms:
- Infused Oils: Soak herbs in natural oils to extract their benefits.
- Teas: Brew herbs and use the tea as a toner or in face masks.
- Powders: Ground herbs can be added to scrubs and masks.
Choose herbs based on your skin’s needs:
| Skin Concern | Recommended Herbs |
|---|---|
| Acne | Tea Tree, Lavender |
| Anti-Aging | Green Tea, Rosehip |
| Redness | Chamomile, Aloe Vera |
Combining natural oils and herbs allows you to customize your skin care routine. This ensures your skin gets the best possible care.
Basic Recipes
Making skin care products at home can be easy and fun. With basic recipes, you can create effective and natural products. These recipes use simple ingredients you probably already have in your kitchen. Below, you will find some easy-to-follow recipes for moisturizers and face masks.
Moisturizers
Creating your own moisturizer is straightforward. You can tailor it to your skin type and preferences. Here are two basic recipes you can try:
- Coconut Oil Moisturizer
This moisturizer is perfect for dry skin. It provides deep hydration and leaves the skin soft.
- Take 1/4 cup of coconut oil.
- Add 1 tablespoon of shea butter.
- Melt the mixture in a double boiler.
- Let it cool slightly.
- Whip the mixture until it becomes fluffy.
- Store in a clean jar.
Use a small amount and apply to your face and neck. This moisturizer is best for nighttime use.
- Aloe Vera Gel Moisturizer
This moisturizer is ideal for oily skin. It is light and non-greasy.
- Take 2 tablespoons of aloe vera gel.
- Add 1 teaspoon of jojoba oil.
- Mix well until combined.
- Store in a pump bottle.
Apply to your face in the morning for a fresh start to the day.
Face Masks
Face masks can rejuvenate your skin. You can make them easily at home. Here are two simple recipes:
- Honey and Oatmeal Mask
This mask is great for soothing and moisturizing the skin.
- Take 2 tablespoons of oatmeal.
- Add 1 tablespoon of honey.
- Add a little water to make a paste.
- Apply to your face and leave for 15 minutes.
- Rinse with warm water.
Your skin will feel soft and smooth after using this mask.
- Yogurt and Cucumber Mask
This mask is perfect for refreshing and cooling the skin.
- Take 2 tablespoons of plain yogurt.
- Add 1/4 of a cucumber, blended or finely chopped.
- Mix well until combined.
- Apply to your face and leave for 20 minutes.
- Rinse with cool water.
This mask helps to tighten pores and brighten your skin.
Tools And Equipment
Creating your own skin care products at home can be both fun and rewarding. Not only can you customize your products to suit your specific needs, but you also get the satisfaction of knowing exactly what goes into them. To get started, you’ll need some basic tools and equipment. These items will help ensure that your DIY skin care products are made with precision and care.
Mixing Bowls
Mixing bowls are essential for blending ingredients together. They come in various materials, including glass, stainless steel, and plastic. Glass bowls are often preferred because they are non-reactive, meaning they won’t affect the ingredients. Stainless steel bowls are also a good choice due to their durability and ease of cleaning. When choosing mixing bowls, consider having several sizes on hand. Small bowls are great for mixing ingredients like essential oils or small batches of creams. Medium bowls work well for recipes that require more volume, such as body lotions. Large bowls are useful for mixing larger quantities, like body scrubs.
| Material | Advantages | Disadvantages |
|---|---|---|
| Glass | Non-reactive, easy to clean | Can break easily |
| Stainless Steel | Durable, easy to clean | Can be reactive with some ingredients |
| Plastic | Lightweight, inexpensive | Can retain odors, may stain |
- Always start with clean bowls to avoid contamination.
- Use separate bowls for different types of products to prevent cross-contamination.
- Label your bowls if you use them for specific ingredients or recipes.
Storage Containers
Once you’ve created your skin care products, you’ll need proper storage containers to keep them fresh and effective. The type of container you choose can significantly impact the shelf life and quality of your products. Glass jars are a popular choice for storing creams, balms, and lotions. They are non-reactive and provide an airtight seal, which helps preserve the product. For items like toners or facial sprays, glass or plastic bottles with spray tops are ideal. Plastic containers are lightweight and less likely to break, making them a good option for travel. However, make sure the plastic is BPA-free to avoid any harmful chemicals leaching into your products. Consider the following when choosing storage containers:
- Size: Choose a size that matches the quantity of the product.
- Material: Glass for longevity, plastic for convenience.
- Seal: Ensure the container has a tight seal to prevent air and bacteria from entering.
- Include the product name and date of creation.
- Add any important usage instructions.
- Indicate if the product requires refrigeration.
- Store in a cool, dark place to extend shelf life.
- Avoid direct sunlight to prevent ingredient degradation.
- Keep out of reach of children and pets.
With the right tools and equipment, making skin care products at home can be easy and enjoyable. Mixing bowls and storage containers are just the beginning of your DIY journey.
Safety And Hygiene
Creating your own skin care products at home can be fun and rewarding. But, focusing on safety and hygiene is crucial to ensure the products are safe and effective. This section will guide you on how to maintain cleanliness and safety while making skin care items at home.
Sterilizing Equipment
Maintaining clean equipment is vital. Dirty tools can introduce bacteria and contaminants into your products. This can lead to skin irritations or infections. Follow these steps to sterilize your equipment:
- Wash with soap and water: Start by washing all tools and containers with warm soapy water. Use a brush to scrub off any residues.
- Rinse thoroughly: Make sure all soap is rinsed off completely. Leftover soap can interfere with your products.
- Boil the equipment: Place the tools in a pot of boiling water for at least 10 minutes. This helps kill any remaining germs.
- Use alcohol: After boiling, wipe down the equipment with 70% isopropyl alcohol. Let them air dry on a clean towel.
Here’s a simple table summarizing these steps:
| Step | Description |
|---|---|
| 1. Wash | Use warm soapy water and a brush |
| 2. Rinse | Rinse thoroughly to remove soap |
| 3. Boil | Boil in water for 10 minutes |
| 4. Alcohol | Wipe with 70% isopropyl alcohol |
By following these steps, you ensure your equipment is clean. This minimizes the risk of contamination, keeping your skin care products safe.
Patch Testing
Patch testing is essential before using any new skin care product. This step helps you check for allergic reactions or irritations. Here’s how to do it:
- Prepare a small amount: Make a small batch of the product for testing.
- Apply to a small area: Dab a small amount on the inside of your wrist or behind your ear. These areas are sensitive and will show reactions quickly.
- Wait 24 hours: Leave the product on for at least 24 hours. Observe the area for any redness, itching, or swelling.
- Check for reactions: If you see any adverse reactions, do not use the product. If there are no reactions, the product is likely safe to use on your skin.
Here’s a quick checklist for patch testing:
| Step | Action |
|---|---|
| 1. Prepare | Make a small batch |
| 2. Apply | Apply to wrist or behind ear |
| 3. Wait | Leave for 24 hours |
| 4. Check | Look for reactions |
Patch testing helps ensure your homemade products are safe. It’s a simple step that can prevent skin issues.
Common Mistakes
Making skin care products at home is fun and creative. It also ensures you know exactly what you are putting on your skin. But, there are common mistakes that beginners often make. These mistakes can lead to problems instead of the healthy, glowing skin you want. Let’s talk about two of the most common mistakes: using expired ingredients and ignoring skin types.
Using Expired Ingredients
One of the biggest mistakes is using expired ingredients. This can be harmful to your skin. Expired ingredients lose their effectiveness. They can also cause allergic reactions or infections. Here are some tips to avoid this mistake:
- Check the expiration dates on all ingredients before use.
- Store ingredients properly to extend their shelf life.
- Use airtight containers for ingredients that easily spoil.
Some common ingredients and their shelf lives:
| Ingredient | Shelf Life |
|---|---|
| Coconut Oil | 2 years |
| Aloe Vera Gel | 1 year |
| Essential Oils | 1-2 years |
| Vitamin E Oil | 2 years |
Expired ingredients can look and smell different. If an ingredient changes color or starts to smell bad, it is likely expired. Always trust your senses. If you are unsure, it is better to throw it away than risk using it.
Ignoring Skin Types
Another common mistake is ignoring skin types. What works for one person may not work for another. Using the wrong products can cause skin problems. Identify your skin type first:
- Dry Skin: Feels tight and may flake.
- Oily Skin: Shiny and prone to acne.
- Combination Skin: Oily in some areas, dry in others.
- Sensitive Skin: Easily irritated or red.
Here are some ingredient suggestions for different skin types:
| Skin Type | Recommended Ingredients |
|---|---|
| Dry Skin | Shea Butter, Avocado Oil |
| Oily Skin | Tea Tree Oil, Witch Hazel |
| Combination Skin | Jojoba Oil, Aloe Vera |
| Sensitive Skin | Chamomile, Calendula |
Always test a small amount of product on your skin first. Watch for any reactions. If your skin feels good, then the ingredient is likely a good match for your skin type. Ignoring skin types can make skin problems worse. Paying attention to these common mistakes can help you create safe and effective skin care products at home.
Storage Tips
Creating your own skincare products at home is fun and rewarding. However, knowing how to store them properly is crucial. Proper storage extends the life of your products and keeps them effective. Here are some essential storage tips to help you.
Cool, Dark Places
Storing your homemade skincare products in cool, dark places is vital. Exposure to light and heat can degrade the ingredients. This makes them less effective and can even cause them to spoil. Here are some tips for storing your products:
- Avoid direct sunlight: Place your products in a cabinet or drawer.
- Keep them cool: Store them in a cool area, away from heat sources like stoves or radiators.
- Use opaque containers: These block out light, protecting the ingredients inside.
Temperature also plays a crucial role. High temperatures can cause oils to go rancid and creams to separate. To maintain their integrity, consider these options:
| Product Type | Optimal Storage Temperature |
|---|---|
| Oils and serums | 15-20°C (59-68°F) |
| Creams and lotions | 10-15°C (50-59°F) |
| Balms and butters | 5-10°C (41-50°F) |
Storing your products properly ensures they remain effective and safe to use for longer periods.
Labeling Products
Proper labeling of your skincare products is just as important as storing them correctly. Labels help you identify each product and its ingredients. They also provide useful information, such as the date of creation and expiration date. Here are some key points to include on your labels:
- Product Name: Clearly state what the product is.
- Ingredients: List all the ingredients used.
- Date of Creation: Note the date you made the product.
- Expiration Date: Estimate the shelf life and write down the expiration date.
Using waterproof labels is a good idea. This ensures the information stays legible even if the container gets wet. Here is an example of a simple label layout:
| Field | Example |
|---|---|
| Product Name | Lavender Face Cream |
| Ingredients | Lavender oil, Shea butter, Aloe vera |
| Date of Creation | 01/10/2023 |
| Expiration Date | 01/04/2024 |
Proper labeling helps you keep track of your products and ensures you use them while they are still fresh and effective.
Sustainable Practices
Creating your own skin care products at home is not only fun but also allows you to adopt sustainable practices. By using eco-friendly ingredients and recyclable packaging, you can contribute to a healthier planet. This guide will show you how to incorporate these sustainable practices into your homemade skin care routine.
Eco-friendly Ingredients
Using eco-friendly ingredients in your homemade skin care products is essential for a sustainable routine. These ingredients are not only gentle on your skin but also kind to the environment. Here are some popular eco-friendly ingredients you can use:
- Coconut Oil: A great moisturizer that is both natural and biodegradable.
- Shea Butter: Rich in vitamins and safe for the environment.
- Aloe Vera: Known for its soothing properties and is easy to grow at home.
- Essential Oils: Like lavender, tea tree, and eucalyptus, which are natural and effective.
When choosing ingredients, look for those that are:
- Organic
- Fair-trade
- Non-GMO
- Cruelty-free
Below is a simple table with some eco-friendly ingredients and their benefits:
| Ingredient | Benefit |
|---|---|
| Honey | Anti-bacterial and moisturizing |
| Oats | Exfoliating and soothing |
| Green Tea | Anti-oxidant and anti-inflammatory |
By choosing these ingredients, you can make effective skin care products while being kind to the earth.
Recyclable Packaging
Packaging plays a crucial role in sustainability. Using recyclable packaging for your homemade skin care products helps reduce waste. Here are some ideas to get you started:
- Glass Jars: Reusable and recyclable, perfect for creams and lotions.
- Metal Tins: Great for balms and can be reused multiple times.
- Paper Bags: Ideal for dry ingredients like bath salts and scrubs.
Consider these tips for sustainable packaging:
- Repurpose old containers instead of buying new ones.
- Label containers with eco-friendly ink.
- Encourage recycling by providing information on how to recycle the packaging.
Here is a table of common packaging options and their benefits:
| Packaging Type | Benefit |
|---|---|
| Glass Bottles | Non-toxic and endlessly recyclable |
| Aluminum Cans | Lightweight and highly recyclable |
| Cardboard Boxes | Biodegradable and easy to recycle |
By choosing recyclable packaging, you can make a positive impact on the environment while enjoying your homemade skin care products.
Frequently Asked Questions
What Ingredients Are Needed For Homemade Skincare?
You will need natural ingredients like essential oils, aloe vera, shea butter, and carrier oils. These are easily accessible and beneficial.
How Do I Make A Diy Face Mask?
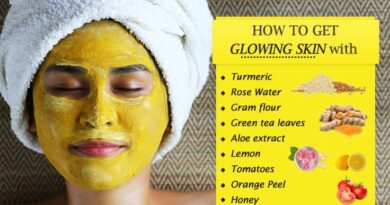
Mix honey, yogurt, and a pinch of turmeric. Apply it to your face. Leave it on for 15 minutes.
Are Homemade Skincare Products Safe?
Yes, they are generally safe. Always patch-test new ingredients on a small skin area first to avoid reactions.
How Long Can Diy Skincare Products Last?
Homemade skincare products usually last about 1-2 weeks. Store them in a cool, dark place to extend their shelf life.
Conclusion
Creating your own skincare products at home is simple and fun. You can choose natural ingredients that suit your skin type. This ensures a healthy and glowing complexion. Plus, homemade skincare is cost-effective and free from harsh chemicals. Start with basic recipes and gradually experiment.
Enjoy the process of making personalized skincare products. Your skin will thank you for the care and attention. So, gather your ingredients and begin your journey to better skin today.